Comandos do pitlane são, propriamente, comandos que dizem ao jogo como os carros se comportam no pitlane, inclusive na entrada e saída. Sua posição é bem rígida, então não há segredo em posicioná-los. Além disso, erros em potencial são mostrados na janela "Track Flags List" no menu "Tools" do GP4Builder.
Para adicionar os comandos do pitlane você deve abrir um setor para exibir seus comandos, selecionar "Add" e escolher o comando em questão. Para quem não sabe onde ficam os comandos, veja este tutorial sobre a estrutura do arquivo .dat. Aqui supomos também que seu pitlane está posicionado corretamente e completo até se juntar novamente à pista.
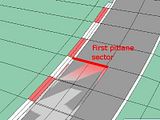
Passo 1 - (AE) Corrects Pit Lines. O comando padrão para começar o pitlane, sempre no primeiro setor. Normalmente não precisa ser adicionado, por já estar lá.
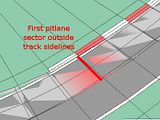
Passo 2 - (9B) Pit Lane Start. Este comando deve ser colocado no primeiro setor do pitlane que não está totalmente dentro da pista. Daqui para frente, os carros passam a seguir a linha central do pitlane.
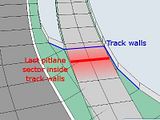
Passo 3 - (9F) Pit Lane Fences Begin. Este comando deve ser colocado no último setor de pitlane ainda dentro dos limites da pista. Daqui para frente, os carros ignoram os muros da pista e passam a ser limitados pelos muros do pitlane.
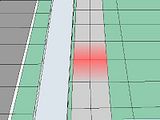
Passo 4 - (96) Speed Limiter On. Neste setor, os carros ligam o limitador de velocidade. Este comando não tem um lugar específico, mas deve ser depois do comando Pit Lane Fences Begin e antes do comando Pits Start.
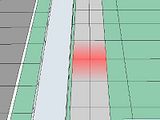
Passo 5 - (89) Pits Start. Este comando marca o início das garagens das equipes. Também não tem um lugar específico, apenas deve ser depois do comando Speed Limiter On.
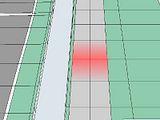
Passo 6 - (F1) Pits End. Este comando marca o fim das garagens das equipes e deve ser colocado exatamente 33 setores depois do comando Pits Start. Além disso, deve ser antes do comando Speed Limiter Off.
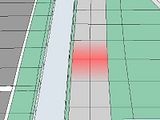
Passo 7 - (97) Speed Limiter Off. Neste setor, os carros desligam o limitador de velocidade. Também não tem um lugar específico, devendo apenas ser depois do comando Pits End e antes do comando Pit Lane Fence End. Em resumo, o oposto de Speed Limiter On.
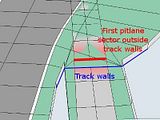
Passo 8 - (A0) Pit Lane Fence End. O oposto de Pit Lane Fences Begin. Este comando deve ser colocado no primeiro setor dentro dos muros da pista, quando o pit começa a voltar à pista. Deste ponto em diante, os carros ignoram os muros do pitlane e passam novamente a ser limitados pelos muros da pista.
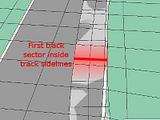
Passo 9 - (9E) Pit Lane End. O oposto de Pit Lane Begin. Este comando deve ser colocado no primeiro setor contido nos limites da pista, quando o pitlane retorna ao traçado normal. Deste ponto em diante, os carros param de seguir a linha central do pitlane.
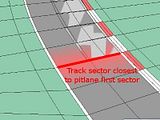
Passo 10 - (86) Connect Pit Lane Start. Este é um dos dois comandos que não é colocado no pitlane, mas sim nos setores de pista. Deve ser colocado no setor de pista mais próximo ao primeiro setor do pitlane. Além disso, é imprescindível que este setor esteja perfeitamente alinhado, ou carros podem ficar presos em pitstops.
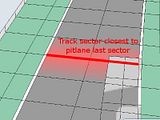
Passo 11 - (87) Connect Pit Lane End. Este é o outro comando colocado nos setores de pista, desta vez no setor mais próximo ao último setor do pitlane. O setor com este comando não precisa estar alinhado com o último setor do pitlane.
Dica 1 - Existem valores adicionais na Magic Data que dizem ao jogo em que posição os carros ignoram a cc-line e se posicionam para entrar no pit; bem como em que posição eles retornam à cc-line após sair do pitlane. Estes são os valores 67 e 68 da Magic Data, identificados como "sectors to pit in 1" e "sectors to pit in 2". Estes valores são sempre relativos aos setores com os comandos Pit Lane Start e Pit Lane End.
June 25, 2011
Step-by-step: Adding pitlane flags
Pitlane flags are nothing more that commands that tell the game how the cars should behave in and out of pitlane. Their position is very strict, so there's no secret in positioning them. Also, potential errors are displayed in GP4Builder at the Track Flags List window (Tools menu).
To add pitlane flags you need to go down to the command level, select "Add" and choose the relevant command. If you don't know what the command level is, refer to this tutorial, step 3. Here we suppose your pitlane is correctly positioned and complete until it rejoins the track.
Step 1 - (AE) Corrects Pit Lines. The default command for starting the pitlane, always at the first pitlane sector. Normally you don't need to add it because it's already there.
Step 2 - (9B) Pit Lane Start. This command should be placed in the first pitlane sector not fully contained inside the track sidelines. From this sector on, cars start following the pitlane centre line.
Step 3 - (9F) Pit Lane Fences Begin. This command should be placed in the last pitlane sector still inside the track walls. From this sector on, cars ignore the track walls and their movement is now limited by the pitlane walls.
Step 4 - (96) Speed Limiter On. From this sector on, cars turn the speed limiter on. It doesn't have a specific place, although it must be after Pit Lane Fences Begin and before Pits Start commands.
Step 5 - (89) Pits Start. This command marks the start of the teams' garages. It also doesn't have a specific place, but must be after the Speed Limiter On command.
Step 6 - (F1) Pits End. This coomand marks the end of the teams' garages and must be placed exactly 33 sectors after the Pits Start command. Also, it must be before the Speed Limiter Off command.
Step 7 - (97) Speed Limiter Off. From this sector on, cars turn the speed limiter off. It doesn't have a specific place, although it must be after Pits End and before Pit Lane Fence End command. The opposite of Speed Limiter On, basically.
Step 8 - (A0) Pit Lane Fence End. The opposite of Pit Lane Fences Begin. This command should be placed in the first pitlane sector inside the track walls, when it starts rejoining the track. From this sector on, cars ignore the pitlane walls and their movement is limited by the track walls again.
Step 9 - (9E) Pit Lane End. The opposite of Pit Lane Begin. This command should be placed in the first pitlane sector fully contained inside the track sidelines when it rejoins the track. From this sector on, cars stop following the pitlane centre line.
Step 10 - (86) Connect Pit Lane Start. This is one of the two commands not placed at the pitlane sectors, but at the track sectors instead. It should be placed at the track sector which is closest to the first pitlane sector. Also, it's very important that this sector and the first pitlane sector are perfectly aligned, or cars may get stuck at pitstops.
Step 11 - (87) Connect Pit Lane End. This is the other command not placed at the pitlane sectors. It should be placed at the track sector which is closest to the last pitlane sector. The sector with this command doesn't need to be aligned with the last pitlane sector.
Tip 1 - There are additional settings at track Magic Data that tell the game for how far behind the pitlane entrance they ignore cc-line and position themselves to enter the pitlane; and likewise, how far the cars should wait to follow the track cc-line after exiting the pitlane. These are the values 67 and 68 at Magic Data, labeled at "sectors to pit in 1" and "sectors to pit in 2" by default. These values are always relative to the sectors which have the Pit Lane Start and Pit Lane End commands.
Marcadores:
gp4,
step-by-step
Subscribe to:
Posts (Atom)